Gallery

From PyMOLWiki
Revision as of 11:12, 26 August 2008 by Ojganesh (talk | contribs)
Jump to navigation Jump to search
PyMOLWiki Gallery
Cool PyMOL-generated Images and their Scripts.

Add Your Own


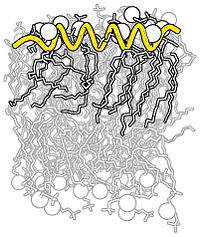
Complex B&W outline representation What To Type
BW raytraced complex image.jpg
Description
Making a B&W outlined image with depth.


See Also
# first load lipid model
load lipids.pdb; 
# hide the initially loaded representation
hide all; 
# set background color to white
bg_color white; 
# show lipid model as sticks
show sticks, lipids; 
# color the lipids model by element CHNOS #2 (carbon green)
util.cbag lipids; 

# select all hydrogens and remove them from the model
select hideme, hydro; 
hide everything, hideme; 
delete hideme;

# create phosphate spheres
create phos, elem p; 
hide everything, phos;
show spheres, phos;

# load helix model
load helix.pdb; 
# hide the initially loaded representation
hide everything, helix;
# make the helical struct into a cartoon form
show cartoon, helix; 
# style the cartoon form
cartoon putty; 

# reposition the helix among the lipids using
# the 3-Button Editing Mouse Mode
# basically
# Shift+Left Mouse to rotate the helix
# Shift+Middle Mouse to move the helix
# also, you may want to make liberal use of the
# get_view and set_view commands.
#
# When you have the scene set like you want,
# continue with...

# move the model to find the view you want, 
# and use get_view to get the coordinate description
get_view;

# set ray_trace_mode to black and white outline
set ray_trace_mode, 2;
Now, you'll need to save multiple versions of your model. (use ray, then png <filename> to save each version)
  1. Version A: with all the elements except for the helix. This will become the background.
  2. Version B: with the 'front' elements, and the helix. Basically this is just a few 'layers' of lipid, with the helix among them. To do this:
    1. move the model around until you visually see the part to remove
    2. switch your Mouse Mode to 3-button viewing, then use the +Box selection (Shift+Left mouse) to select the 'background' portion to hide.
    3. choose Hide>Everything for the selection
    4. use the code from get_view to go back to the original view
Finally, you will need to compose the image in Photoshop (or Gimp, here I'll use Photoshop).
  1. Load the two versions.
  2. Select the white background in Version B, then choose Select>Color Range...
  3. Make sure 'Select' is set to 'Sampled Colors', and 'Fuzziness' is set to 150, then click okay.
  4. delete the white selection, then choose Select>All
  5. copy the picture, then switch to Version A and paste the selection (it should paste into its own layer as 'Layer 1')
  6. Click on 'Layer 0' (which is Version A) and change its opacity to 30%
  7. Create a new layer under 'Layer 0' which is filled with white only (or whatever background color you like)
  8. Click on 'Layer 1' (which is Version B), and using the Move tool (and nudge), align the molecules in 'Layer 1' to 'Layer 0'
  9. Some parts of 'Layer 1' are transparent and shouldn't be. Using the Paint Bucket tool fill in these areas with white (or whichever color you find appropriate).
  10. Admire your handiwork; put it in a publication, presentation, or poster.


A "Sliced" Image What To Type
Image merged.png
Description
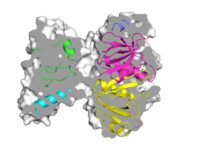
A more complex example of how to create an image of a slice.


See Also
# example script for creation of an image with a slice region
load $PYMOL_PATH/test/dat/1tii.pdb
orient

# must disable depth cue and shadows
unset depth_cue
unset ray_shadows
set ray_trace_mode, 0

# this controls the z depth of the slice plane
# (sets it halfway between the clipping planes)
fraction = 0.42
view = cmd.get_view()
near_dist = fraction*(view[16]-view[15])
far_dist = (view[16]-view[15]) - near_dist
cmd.clip("near", -near_dist)

# render opaque background image
as surface
set ray_interior_color, grey80
set opaque_background
set surface_color, white
ray
save image_back.png

cmd.clip("near", near_dist)
cmd.clip("far", far_dist)

# render the foreground image
as cartoon
util.cbc
unset opaque_background
ray
save image_front.png

# now use Photoshop, Gimp, or ImageMagick to combine the images
system composite image_front.png image_back.png image_merged.png
system display image_merged.png


Grid Mode What To Type
Gm2.png
Description
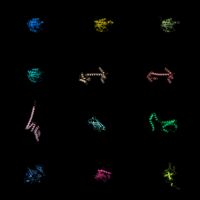
This image shows Grid Mode in action.


See Also
fetch 1cll 1sra 1ggz 5pnt 1rlw 1cdy;
set grid_mode


Cool Perspective What To Type
Fov60.png
Description
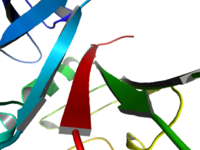
This image shows a perspective through Field_Of_View.


See Also
load prot.pdb;
zoom i. 46-49 and n. CA
set field_of_view, 60
ray


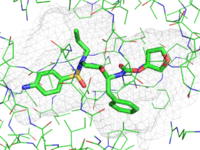
Representing a binding pocket What To Type
Pocket.png
Description
This image shows a nice way to show binding surfaces


See Also
load $TUT/1hpv.pdb, tmp
extract lig, organic
extract prot, polymer
delete tmp

set surface_carve_cutoff, 4.5
set surface_carve_selection, lig
set surface_carve_normal_cutoff, -0.1

show surface, prot within 8 of lig
set two_sided_lighting
set transparency, 0.5
show sticks, lig
orient lig

set surface_color, white
set surface_type, 2  # mesh
unset ray_shadows


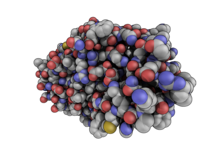
QuteMol Like What To Type
QuteMolLike.png
Description
QuteMol like image--modern feel to it.


See Also
load $TUT/1hpv.pdb
set_color oxygen, [1.0,0.4,0.4]
set_color nitrogen, [0.5,0.5,1.0]
remove solvent
as spheres
util.cbaw
bg white
set light_count,10
set spec_count,1
set shininess, 10
set specular, 0.25
set ambient,0
set direct,0
set reflect,1.5
set ray_shadow_decay_factor, 0.1
set ray_shadow_decay_range, 2
unset depth_cue
# for added coolness
# set field_of_view, 60
ray